Axios攔截器
實務上處理 Token 過期、統一錯誤處理(如 401, 500)都會用到
5.8 Axios 攔截器(Interceptors)
檔案位置
通常會獨立一個 axios 檔案(請依照公司實際規定)
src/
 ├── api/
 │    └── axios.js
用途說明
- 自動帶 Token
- 統一錯誤處理(401 / 500)
你的專案有 10 支 API,每一支都需要帶 Token,你現在的寫法大概是這樣:
axios.get("/api/products", { headers: { Authorization: `Bearer ${token}` } });
axios.post("/api/orders", data, {
  headers: { Authorization: `Bearer ${token}` },
});
axios.delete("/api/products/1", {
  headers: { Authorization: `Bearer ${token}` },
});
// ...每一支都要寫一次
又或者每一支 API 都要自己處理錯誤:
try { ... } catch(err) {
  if (err.response?.status === 401) { // 每支都寫一次
    alert("請重新登入");
  }
}
這樣很累,而且萬一要改,要改 10 個地方。
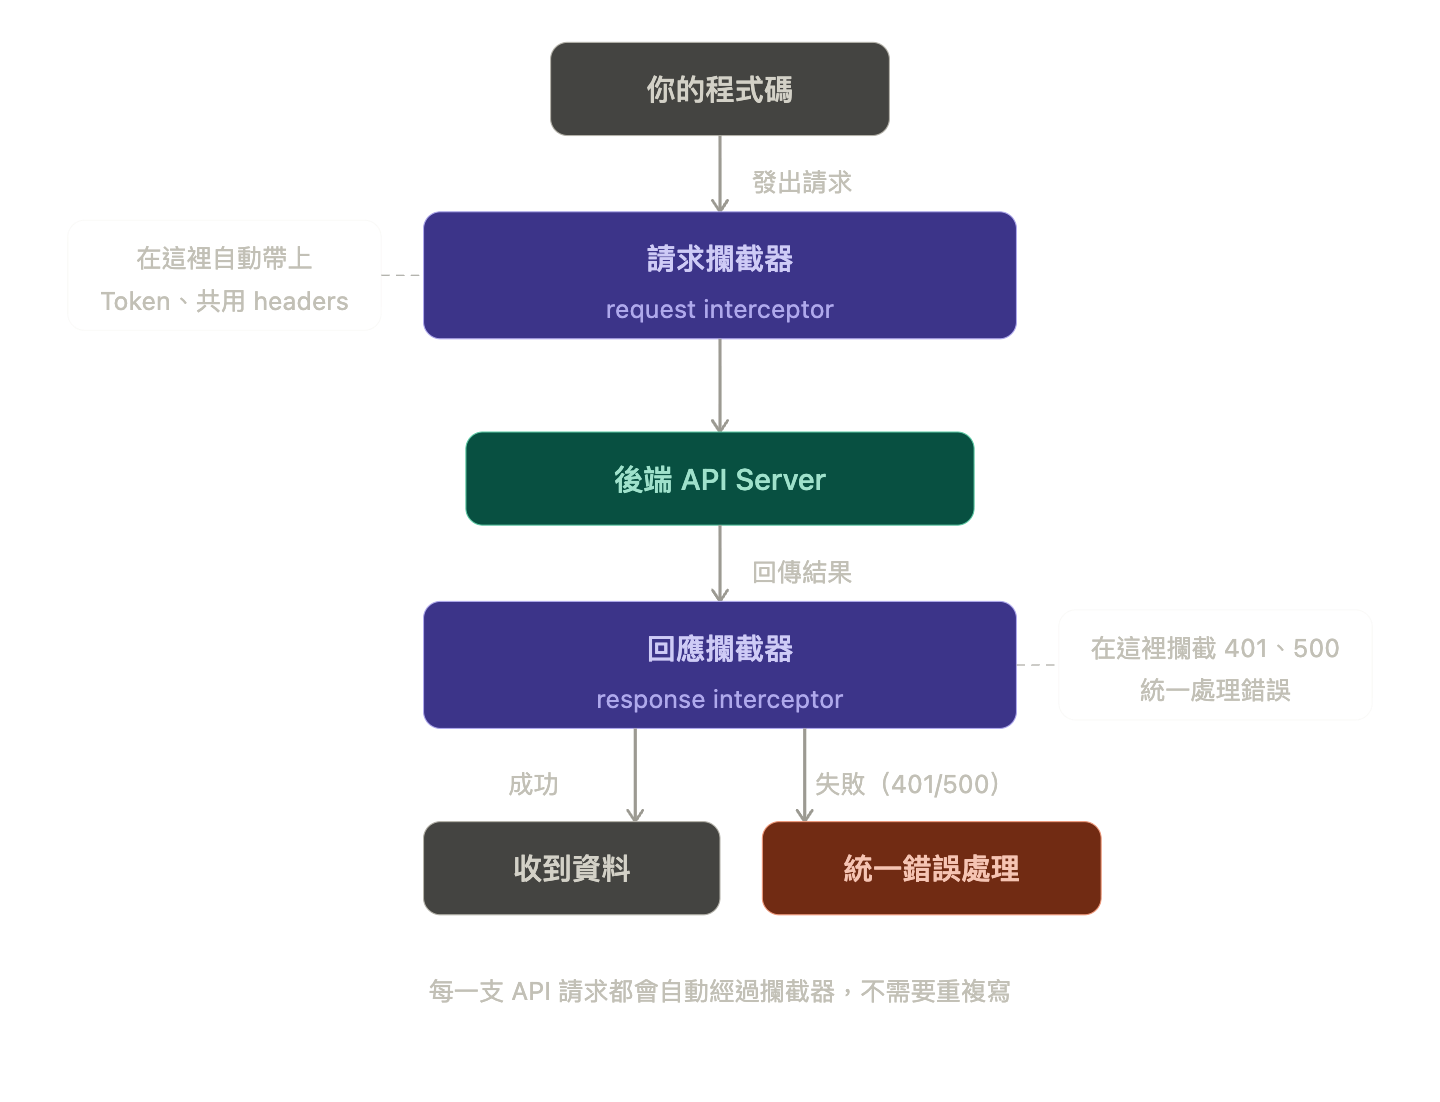
範例(請求攔截)
axios.interceptors.request.use((config) => {
  // config 就是這次請求的所有設定
  // 你可以在這裡塞東西進去,然後把 config 還回去
  const token = localStorage.getItem("token");
  if (token) config.headers.Authorization = `Bearer ${token}`;
  return config; // 一定要 return,否則請求就停在這不動了
});
範例(回應攔截)
axios.interceptors.response.use(
  (response) => response, // 成功:直接放行,不動它
  (error) => {
    // 失敗:在這裡統一處理
    if (error.response?.status === 401) {
      window.location.href = "/login"; // 自動導回登入頁
    }
    return Promise.reject(error); // 把錯誤繼續往外丟,讓各自的 catch 還是能收到
  }
);
實務用途
- Token 自動帶入
- API 錯誤統一處理
- 登入失效自動導頁